Guide to nail string art + free llama pattern!
Published on 23 April 2019 By Christine Leech 1 min read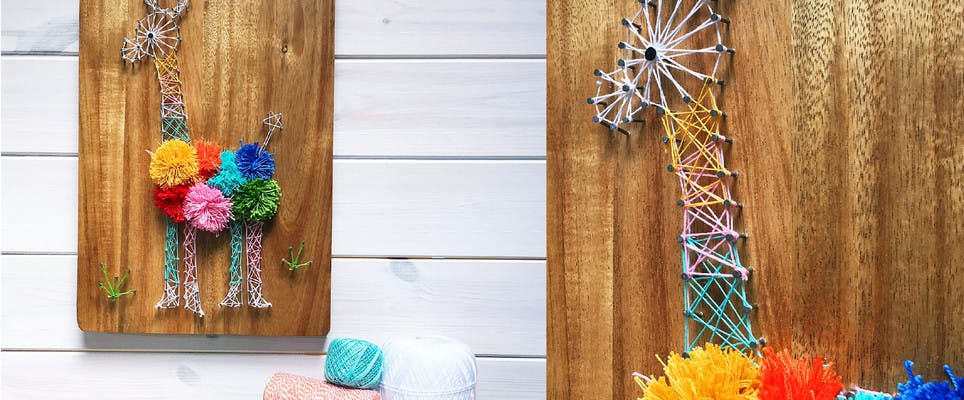
Retro wall art is making a comeback! Brighten up any space with nail string art, the home decor craft that is created by securing nails to a board to make an outline then winding yarn between the fixtures to fill in the space. Perfect for using up leftover yarn from your stash, and an easy project for complete beginners.
Nail yarn art is a wonderful alternative way to create a yarny craft - for those with zero knitting experience or stitch skills. In fact, no knitting needles are required at all. Christine Leech gives her step-by-step guide on how to make this zingy bright llama nail string art, complete with pom pom body, sure to brighten any space in your home!
For this nail yarn art tutorial I have taken the ancient (at least from the 1970's) art of nail and string work and given it a fun colourful twist with this Llama and pom pom piece of wall art.
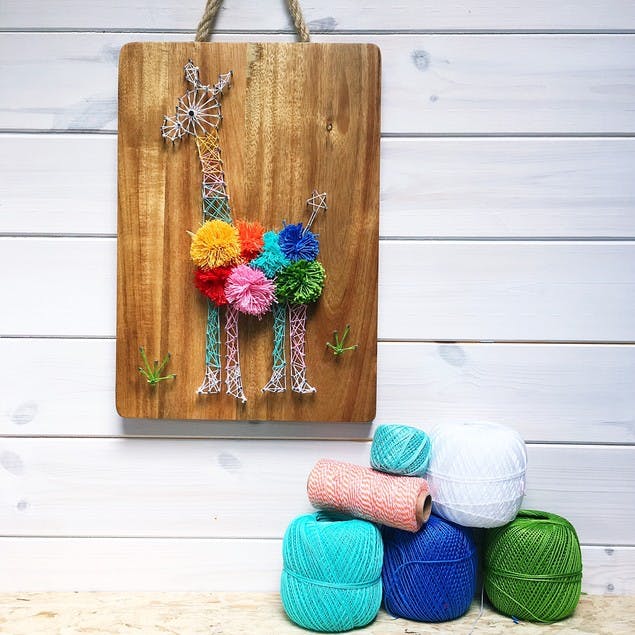
Initially I was thinking of using drift wood or old floorboards for the wood part of this project but then I thought who actually have these lying around and it's a bit of a faff to sand all the edges and drill the hanging holes before you even get to the fun crafty bit. When I was out shopping I noticed there were lots of wooden chopping boards and serving platters that were interesting shapes, with ready made hanging holes and I thought they were perfect for this project!
Materials
- A wooden chopping board or serving platter
- Small 15mm pin nails
- 1 slightly larger nail for his eye
- A small hammer
- Long nosed pliers (optional)
- Cotton yarn size 10 in various colours
- Black Sharpie pen
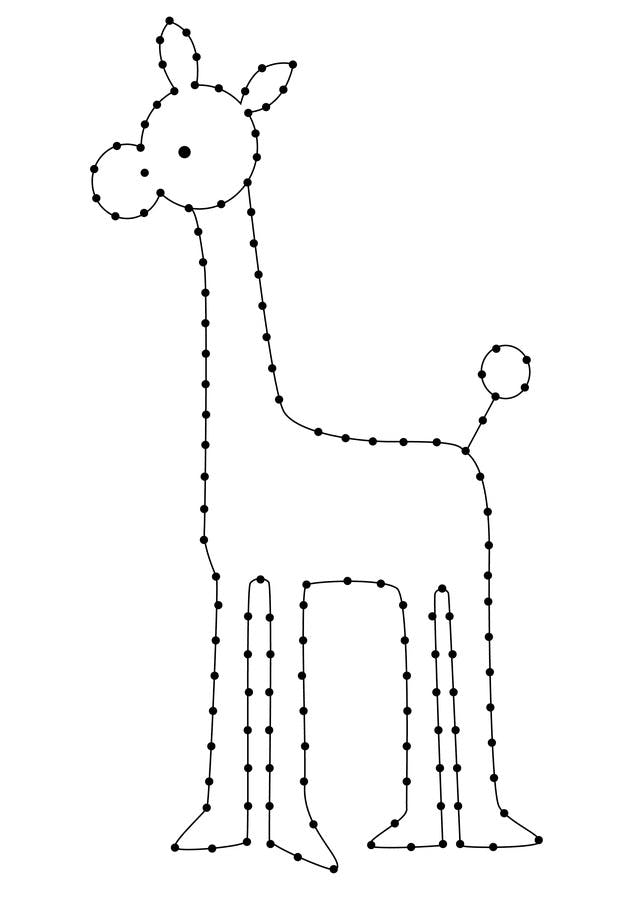
- The llama template (below)
Learn to make your llama nail string art
1
Fix your template to your board. Take the template and tape it to the wooden board.
2
Secure the nails. Starting anywhere on the template begin tapping the nails into the wood, keep going till you've done the whole outline. If the nails get fiddly to hold you can grip them between a pair of long nose pliers which will make it easier. Hammer the larger nail in place for his eye.
3
Remove template. Rip the template from the wood, make sure you get all the paper bits away from the nails.
4
Add yarn. Take the white yarn and tie it to one of the nails, begin winding the yarn around the nails, wind the yard around a nail, pull tight and then move on to the next, wind all around the outline.
5
Create a thicker outline. As you reach his tail, wind the yarn between the nails to create a star shape then wind the yarn back down the tail nails in the opposite direction to create a thicker outline.
6
Fill in the shapes with coloured yarn. When you have completed the outline start filling in the shapes with different coloured yarns. There's no rhyme or reason to the way I have wound the yarn in his legs - it's like one of those games you used to play with pens and dots and seeing if you could reach every dot without taking your pen off the paper. Wind back and forth till you are happy with the pattern, to accentuate the outline also wind the coloured yard between the nails as you did the white outline.
7
Fill the legs and neck with yarn. When you reach his face there is a slightly different technique to use. Tie the white yarn to the eye nail and then working your way around the circle of nails that make up his face. Wind the yarn around one nail, cross it over and then wind back around the eye nail. Keep going around the circle till the face is complete. Repeat the technique around his muzzle.
8
Take your sharpie. When finished colour the top of the nail black with a sharpie pen.
9
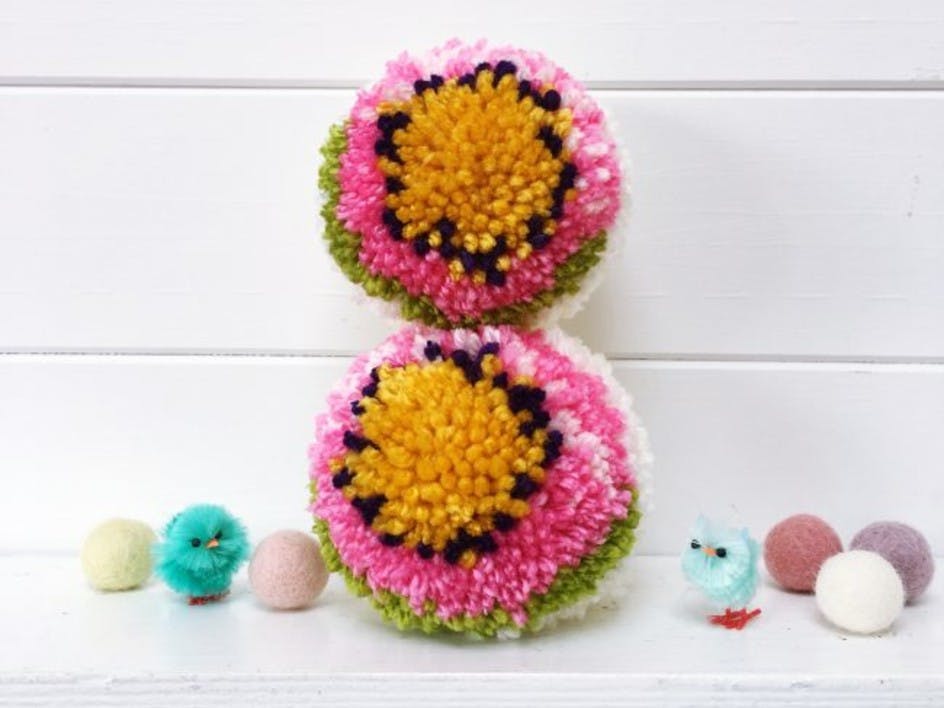
Make pom poms. Make seven pom poms using a small pom pom maker or even around a fork and using a glue gun fix them in place in the body space.
10
Finishing touches. Add some extra nails to make clumps of grass or extra decorations.
Learn how to make a pom pom
If you're new to making pom poms, fear not! Our guide on how to make a pom pom is here to help. Watch the step by step video below.