A beginner's guide to circular knitting needles
Published on March 6, 2014 By Anjuli 3 min read
If you've never used circular knitting needles, you may not know how brilliant and versatile they are. They can be used to knit in the round or straight, just like with ordinary needles. They're compact so that you can knit just about anywhere, and once you've finished a row you can slide all your work onto the cable pop it in your bag without the fear that all your knitting will slide off the needles. This beginner's guide to knitting with circular needles will show you everything you need to know to get started.
On the Straight & Narrow
It might seem odd to use circular needles to knit straight, but by using them in this way you’ll save your wrists and hands from having to hold up all your knitting as you’ll find that it sits nicely in you lap on the cord. This is especially good if you are knitting a huge blanket or throw in a bulky heavy yarn.
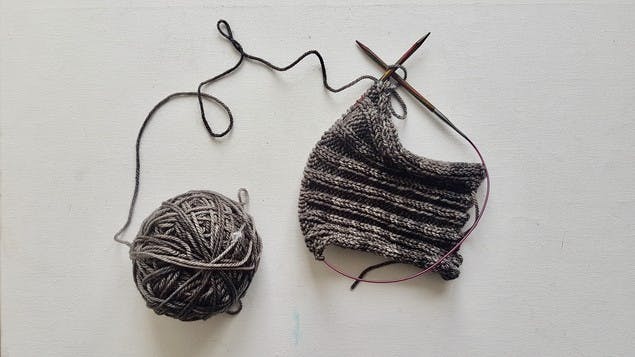
To use your circulars as straights simply cast on and knit just as you normally would. At the end of each row, just switch the needles around as you would with normal straight needles- it’s that simple.
The next way you can use your circulars is “in the round”.
Round and round we go
Circulars are used in the round when you need to make a garment or accessory without a pesky seam to stitch up. This technique is most commonly used when knitting hats or socks but it can be used for jumpers and sleeves too.
To get started with circulars you need to choose a size that is closest to the finished size of your garment. For a hat you would probably need about 40cm, this measurement is from tip to tip and not the length of the cord itself. Once you have got the right length needles casting on is the same as when knitting on straights, cast on your desired amount of stitches, now to join the stitches “in the round”.
There are a few techniques for this but an easy way is to cast on an extra stitch, slip that stitch onto the left-hand needle, and then knit the first stitch and the last stitch together before starting the pattern.
Just make sure that all the stitches are facing the same direction before you make your join. That means all the little loopy bits from casting on the stitches should be on the inside of the circle made by the circular needle, without twisting the edge. Then you can make the join and knit as your pattern lays out. If you get a twist the only way to fix it is to frog it all (rip it, rip it) and start again.
Most people will now add a stitch marker to show the beginning of the round, but if you cast on with the cable knit method the tail will always indicate where the first stitch is.
Two at a time
1
Using two circulars at once might sound terribly daunting and more than a little confusing but once you get the hang of it you’ll wonder why you didn’t just do this to begin with.
First you’ll need two circular needles of the same size (the cord doesn’t need to be the same size for each but needs to be 60cm or more to work). You need to cast on as above, just like you would on straights. Divide the stitches in half and slip half onto the other set of needles. You can then join the round. Move all the stitches onto the cords in the middle of the needles.
Cast on: Cast on stitches as normal onto one needle.
2
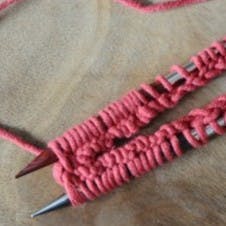
Spread out the stitches. Slip half the stitches onto the second set of needles and join the round as instructed previously. You can see half the stitches are on the wooden set of needles, and half are on the metal set.
3
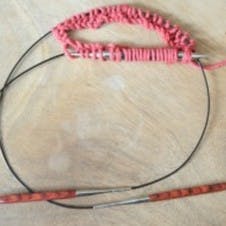
Use both needles and cables. You can see here one set of needles hold half the back stitches, while the other holds the others ready for knitting.
4
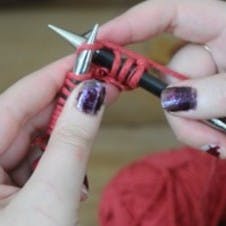
Knit. Now it gets a little more complicated as although the stitches are in the round, we will be working each needle separately. Taking the needles that are closest to you push the stitches down onto the left hand needle. Using the right hand needles, that’s connected to the left one (be careful not to get this wrong!) start knitting as if the back stitches and hanging needles didn’t exist.
Knit the first set, like the other needles don’t exist. When you get to the end, drop these ones and pick up the other set and continue knitting.
5
When you get to the end of the row, turn the project around and push the needles up on to the left hand needles as before, knit the first stitch, and pull it tight to avoid laddering your work, then push the worked stitches from the other needle back down onto the cord. Now work the rest of your stitches as before, ignoring the stitches on the other needles behind it.
Continue with this all the way around, again and again. You’ll find that when you need to decrease you can do so with ease, because you’re not depending on the length of the cord. It’s a great technique for sock knitting once you get the hang of it. When it comes to the pesky heel turn you can hold you other stitches on the one needle and just focus on the one set for the heel, you can spread them out again afterwards. Simple!
Knitting in the round with two circular needles feels a little strange at first, but after a few rows you should begin to see your project taking shape (with no twists!) and will quickly gain confidence.
Working with two needles like this is similar to using double pointed needles (DPN's) in that you need to use more than on set of needles, but for an alternative you can use just one set of circular needles and use the magic loop technique.
Magic loop
1
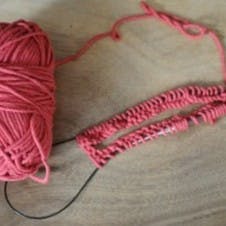
As above you need to just cast on the desired stitches and then you need to work out your halfway mark. When you have it, pull the cord of your circulars in between these stitches, so you have a loop that separates one half of stitches from the other. Now join the stitches in the round as before.
Here the cable has been pulled through the stitches at the halfway mark creating a loop.
2
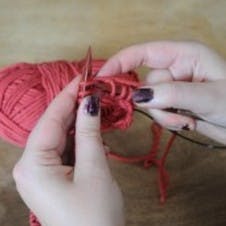
You can hook a little stitch marker onto the cord, so if the loop disappears (don’t panic if it does!) you know where to pull it out from again.
To knit on this one magically loopy set of circulars hold one needle in your left hand, and push all the stitches on this onto the needle, then slide all the stitches at the back onto the cord, so the right hand needle is free to do it’s job. Start knitting the stitches from the left to the right, until you get to the end. Clip your stitch marker between the just knitted, and cast on stitches, give the cord a pull to form a loop, and swap the needles around. Now push the cast on stitches from this side up the needle, leaving the just knitted stitches on the cord at the back and knit these using your once again free right hand needle.
3
Having pulled the right hand needle through, leaving the back stitches on the cord you are able to knit the stitches off of the left hand needle as normal.
Continue to do this round and round as your pattern instructs until you have a lovely garment to wear. The greatest benefit to the magic loop method is that you can knit many different circumferences with one long needle, eliminating the need to buy needles in different lengths.
This technique, and all the “in the round” techniques described above can be used anywhere that a pattern asks for DPNs as well. Instead of dividing the stitches over 3 or 4 needles, you just need to divide it in half.

